
Breakfast & Brunch
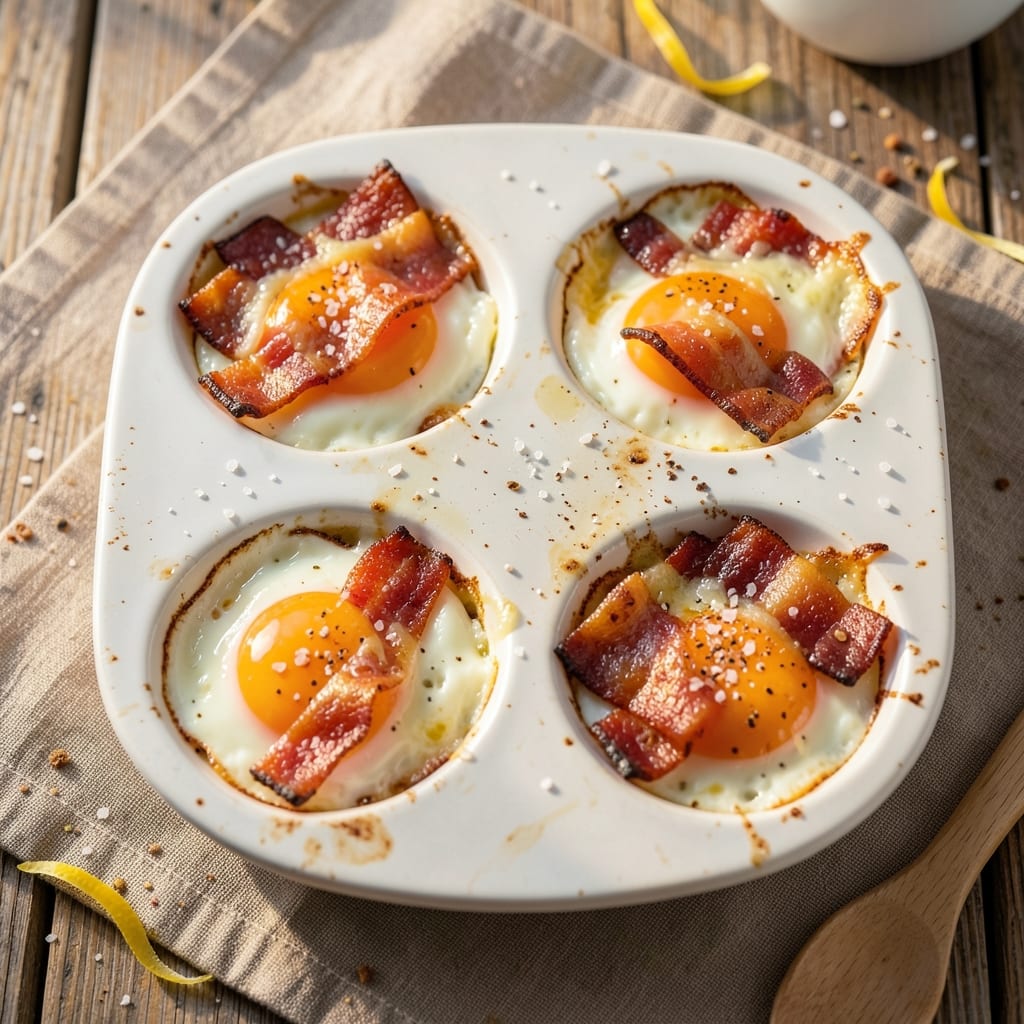
This bacon and egg breakfast cups recipe delivers crispy edges and runny yolk perfection in under 20 minutes—ideal for busy mornings or meal prep. The secret lies in baking the bacon first to render fat, then using that flavorful oil to cook the eggs directly in the muffin tin. Every bite combines smoky bacon, tender eggs, and a golden crust that stays crispy even when you grab them on the go.
What makes these breakfast cups special is their foolproof method—no flipping required, just layering ingredients in a muffin tin and baking until set. The bacon becomes extra crispy from the high-heat start, while the eggs cook to your preferred doneness (runny yolks are guaranteed). This recipe also works as a base: add cheese, spinach, or even hash browns for extra heartiness.
By the time you're done, you'll have a batch of portable, handheld breakfast cups that pack all the flavors of a diner-style plate without the mess. They reheat beautifully, making them perfect for lunches or quick breakfasts. The aroma alone will wake up your kitchen—and your appetite—like nothing else.
Whether you're feeding a family, meal prepping for the week, or just craving a satisfying morning bite, these crispy-edged cups deliver restaurant-quality results with minimal effort. Let's get started!
Ingredients for bacon and egg breakfast cups
Crispy bacon, runny yolks, and golden crusts—just these 12 ingredients transform mornings into diner-style magic.
| Ingredient | Amount | Notes |
|---|---|---|
| Center-Cut Bacon 🥓 | 12 oz | Thick-cut preferred for crispiness |
| Large Eggs 🥚 | 12 whole | Room temperature for even cooking |
| All-Purpose Flour 🌾 | ½ cup | For golden crust texture |
| Sharp Cheddar Cheese 🧀 | 1 cup | Shredded, sharp flavor preferred |
| Milk 🥛 | ¼ cup | Whole milk for creaminess |
| Salt 🧂 | 1 tsp | Kosher salt for seasoning |
| Black Pepper 🌶️ | ½ tsp | Freshly ground for best flavor |
| Garlic Powder 🧄 | ½ tsp | For subtle depth of flavor |
| Cooking Spray 🫧 | 1 tbsp | Non-stick for easy release |
| Muffin Tin 🍞 | 1 whole | 12-cup size recommended |
| Aluminum Foil 📄 | 1 sheet | For easy transfer |
| Fresh Chives 🌿 | 2 tbsp | Chopped, for garnish |
The bacon is non-negotiable here—thick-cut gives you that perfect crunch, and center-cut stays crispy longer. Grab Oscar Mayer or Butterball if you're in a hurry, but local butcher slices taste even better. Look for bacon with good marbling—it renders more flavorful fat. I usually buy a 16-oz package and freeze half for next time. The eggs? Room temperature is key—they'll cook more evenly, and you'll get that perfect runny yolk. If you're prepping ahead, keep them at room temp for 20 minutes before baking.
No sharp cheddar? Pepper jack or Gruyère work too—just shred it yourself for better texture. Running low on milk? Heavy cream or half-and-half makes the crust richer, but whole milk keeps it simple. The flour is just for that golden crust—no need for fancy brands. Bob's Red Mill or King Arthur are solid choices. Want extra flavor? Add a pinch of smoked paprika to the flour mix. The muffin tin? Non-stick is ideal, but if yours isn't, spray it well and line with foil for easy release. Pro tip: Grease the tin with bacon fat after baking the bacon—it adds insane flavor.
These reheat like a dream—microwave 30 seconds or pop in a 350°F oven for 5 minutes to revive crispiness. Store leftovers in the fridge for 3 days, covered tightly. Freeze extras in a single layer before transferring to a bag for up to 2 months. I always make a double batch—half for breakfast, half for lunches. The foil makes them easy to grab and go, and they stay crispy even when cold. Garnish with fresh chives right before eating—they add a bright pop of color and freshness.
Why You'll Love This Recipe
- The secret’s in the crust: flour, milk, and a quick egg wash give those cups a golden, almost biscuit-like shell while keeping the inside runny and cheesy. That first bite? Pure satisfaction.
- Five-Ingredient Magic: I swear, this is the kind of recipe where you look at the pantry and realize you already have everything. Crispy center-cut bacon, rich eggs, and that sharp cheddar—it’s like breakfast built a flavor fortress with minimal effort.
- Crispy-Creamy Contrast: The secret’s in the crust: flour, milk, and a quick egg wash give those cups a golden, almost biscuit-like shell while keeping the inside runny and cheesy. That first bite? Pure satisfaction.
- Lunchbox Hero: Between us, these reheat beautifully—pack them cold for work or pop them in the microwave for a 30-second office lunch. My kids actually want to bring them to school. (Yes, even on a Tuesday.)
Step-by-step instructions for bacon and egg breakfast cups
Here's how to make these crispy, runny-yolk breakfast cups in under 30 minutes.
Cook the Bacon Until Crispy
Preheat your oven to 400°F and line a baking sheet with the aluminum foil. Cut the 12 oz center-cut bacon into 1-inch pieces and place them on the prepared baking sheet in a single layer. This ensures even cooking and maximum crispiness.
Bake for 12-15 minutes until the bacon is deep golden brown and the edges are crispy. Watch closely after 10 minutes—the bacon should release easily from the foil when ready. Remove from the oven and drain on paper towels, reserving 2 tablespoons of the bacon fat for later use.
Prepare the Egg Mixture
In a large bowl, whisk together the 12 whole large eggs, 0.25 cup milk, 0.5 cup all-purpose flour, 1 cup shredded sharp cheddar cheese, 1 tsp salt, 0.5 tsp black pepper, and 0.5 tsp garlic powder until fully combined. The mixture should be smooth and slightly thick—this ensures a firm but tender egg base.
Here's the thing—don't overmix. Just combine until there are no dry spots of flour. This step is crucial for achieving that perfect texture where the eggs are firm on the outside but still creamy inside.
Assemble the Breakfast Cups
Lightly spray the 12-cup muffin tin with the 1 tbsp cooking spray, making sure to coat all the cups evenly. This prevents sticking and makes cleanup a breeze. Divide the crispy bacon evenly among the muffin cups, placing about 1 tablespoon of bacon in each.
Pour the egg mixture over the bacon, filling each cup about ¾ full. The mixture should settle slightly, so don't overfill. Tap the muffin tin gently on the counter to help distribute the mixture evenly in each cup.
Bake to Golden Perfection
Return the muffin tin to the preheated oven and bake for 15-18 minutes until the edges are golden brown and the centers are just set. You're aiming for a firm exterior with a slightly runny yolk in the middle—this is what makes these breakfast cups so delicious.
To check doneness, insert a toothpick into one of the cups. It should come out clean or with just a few moist crumbs. If the toothpick comes out completely dry, the eggs are overcooked. Remove from the oven immediately when they're just set.
Garnish and Serve Immediately
Let the breakfast cups cool for 2-3 minutes before removing them from the muffin tin. This brief resting period helps them hold their shape better. Use a small spatula to gently loosen the edges if needed, then transfer each cup to a plate.
Garnish each cup with 2 tbsp chopped fresh chives, sprinkled evenly over the top. Serve immediately while the eggs are still warm and the yolk is perfectly runny. These breakfast cups are best enjoyed right away—they're designed for that fresh-out-of-the-oven experience.
Pro Tips For Making Bacon And Egg Breakfast Cups
- CRANK THE HEAT FIRST: The bacon needs to sizzle hard for the first 3 minutes—no wimpy medium heat. I used to cook it slow, and the edges stayed greasy instead of crisp. High heat = faster cooking and that satisfying crunch you want in breakfast cups.
- DRY THE EGGS WELL: Pat those eggs thoroughly with a paper towel before dropping them into the muffin tin. Wet eggs slide around and steam instead of setting properly. I learned this the hard way when my first batch came out more like egg soup than a solid top.
- SALT THE BACON LIBERALLY: Don’t hold back on the salt—sprinkle it generously before cooking. The center-cut bacon is leaner and needs extra seasoning to stand out. I was skeptical until I tried it; now I double the amount in the recipe.
- USE COLD MILK FOR BATTER: Mix the flour, milk, and egg for the batter with cold milk—no warm or room-temp shortcuts. Cold milk creates a lighter, fluffier texture in the cups. I skip this when I’m rushed, and the result is noticeably denser.
Common mistakes when making your bacon and egg breakfast cups
Overcooking the Bacon
I’ve seen this happen more times than I can count—bacon turning into brittle, burnt sticks instead of crispy, flavorful pieces. The key is timing: 12-15 minutes at 400°F is your sweet spot. If you’re using thicker cuts, start checking at 10 minutes—they’re ready when the edges are deep golden brown and the bacon releases easily from the foil. Overcooking drains out all the fat and flavor, leaving you with sad, dry strips. 🔥
Skipping the Fat Reserve
That rendered bacon fat isn’t just for flavor—it’s your secret weapon for crispy egg cups. I always reserve 2 tablespoons of it to grease the muffin tin after baking the bacon. The fat adds richness to the eggs and prevents sticking. If you drain it all, your eggs will be dry and lack that golden crust. Trust me, the difference is night and day!
Overfilling the Cups
This is a rookie mistake that leads to messy, overflowing egg cups. Fill each muffin tin cup only ¾ full—the mixture will settle as it bakes. Overfilling causes the eggs to spill over, creating a sticky mess in your oven and a less-than-perfect shape. Tap the tin gently on the counter after adding the mixture to help distribute it evenly. 💡
Underbaking or Overbaking the Eggs
The eggs should be firm on the outside with a slightly runny yolk in the center. Underbaking leaves them too soft, while overbaking turns them rubbery. Check doneness with a toothpick—it should come out clean or with a few moist crumbs. If it’s completely dry, your eggs are overdone. Remove them from the oven the moment they’re set to preserve that perfect texture.
Ignoring Room Temperature Eggs
Cold eggs from the fridge won’t cook evenly, leading to uneven textures and potentially undercooked centers. Let your eggs sit at room temperature for 20 minutes before baking. This ensures they cook through consistently and gives you that perfect runny yolk. Pro tip: Take them out of the fridge while the oven preheats—it’s a great time to chop your chives too! 🥚
Not Preheating the Muffin Tin
Cold muffin tins can cause the eggs to cook unevenly, especially at the edges. Always preheat your muffin tin in the oven for 5 minutes before adding the bacon and egg mixture. This ensures even cooking and helps create that golden crust. If you’re in a hurry, just spray it with cooking spray after preheating—it makes all the difference! ⏰
Nutrition facts
Frequently asked questions
Can I make these breakfast cups ahead of time?
Yes, but with a few key adjustments! Store them in an airtight container in the fridge for up to 3 days, but the eggs will firm up completely. For best results, reheat in a 350°F oven for 5-7 minutes to restore crispiness. Freeze extras for up to 2 months—thaw overnight in the fridge before reheating.
What if I don't have a muffin tin?
No problem! Use a ramikin pan, silicone muffin molds, or even small oven-safe ramekins. Just ensure they're heatproof and can handle 400°F temperatures. Line them with foil if needed for easy release. The baking time remains the same—just check for doneness with a toothpick.
Can I add other ingredients like hash browns or veggies?
For extra heartiness, crumble ½ cup cooked hash browns into the egg mixture or layer ¼ cup sautéed spinach between the bacon and eggs. Just reduce the egg mixture slightly to avoid overfilling. Keep additions small—too much can make the cups too dense and prevent proper baking.
Why did my eggs turn out rubbery?
Overbaking is the most common cause—remove them when the toothpick comes out clean or with just a few moist crumbs. Another reason could be cold eggs straight from the fridge. Let them sit at room temperature for 20 minutes before baking. If the mixture was too thick, add 1 extra tablespoon of milk next time for a lighter texture.
How do I make these gluten-free?
Swap the all-purpose flour for ½ cup gluten-free 1:1 baking flour and add ½ teaspoon xanthan gum to mimic the binding properties. The texture will be slightly different but still delicious. Ensure all other ingredients (like cheese) are certified gluten-free to avoid cross-contamination.